


Model Context Protocol (MCP) Explained
The Universal Connector for AI Systems

Hi folks,
This blog post is about something that I find incredibly powerful and transformative: the Model Context Protocol (MCP). After exploring various AI integration approaches, I've written this post to make MCP easy to understand for everyone.
In this post, I'll explain what MCP is and why it matters, walk through how it works, and show you how to use it in your projects.
I will show you how to create your own MCP server and examples of using existing ones.
The Problem MCP Solves
Imagine you have a powerful AI assistant that can help with coding, data analysis, or customer support. Now imagine that assistant is locked in a room – it's smart but has no direct access to your databases, files, or tools. If you want it to use some information, you have to manually hand it over. Frustrating, right?
This is the situation many LLMs have faced: they're isolated from the vast context and tools that could make them truly useful. It's like having a brilliant consultant who can only work with the documents you physically bring to them, with no way to search for information or use tools on their own.
While solutions like RAG help with retrieving information and various agent frameworks allow for tool use, there's a deeper problem: every integration requires custom code, special prompting, and bespoke solutions. Each new data source or tool needs its own connector, its own protocol, its own safety checks. This fragmentation creates a maintenance nightmare and makes it extremely difficult to build comprehensive AI systems that can work across multiple data sources and tools in a standardized way.
What is Model Context Protocol?
Model Context Protocol (MCP) is an open standard (initially released by Anthropic in late 2024) that defines a universal way for AI models to connect with external data sources, tools, and environments.
Here's a simple analogy: MCP is like a USB-C port for AI applications. Just as USB-C provides a standard way to connect various devices (phones, laptops, cameras) to different peripherals (chargers, monitors, storage), MCP provides a standard protocol that lets AI models connect to various data sources and tools.
Before MCP, connecting an AI to your data was like carrying a bag full of different chargers for every device – tedious and fragile. Each new integration required custom code and special prompting. MCP changes that by creating a plug-and-play layer that works across different AI models and data sources.
Why MCP is a Game-Changer
MCP transforms how we build AI applications in several important ways:
Standardization: Instead of building one-off integrations for every database, API, or file system, developers can use MCP as a common interface. This dramatically reduces development time and maintenance headaches.
Growing Ecosystem: Because MCP is open and standardized, many common integrations have already been built by the community. Need your AI to pull data from PostgreSQL? Or interact with GitHub? There's likely an MCP connector for that, which you can reuse instead of writing from scratch.
Unlocking AI's Potential: Most importantly, MCP frees AI from its isolation. With it, our AI assistants can actually use the knowledge and tools we have, leading to more relevant answers and the ability to take actions on our behalf.
By early 2025, MCP had become widely adopted, with popular developer tools like Cursor, Replit, Zed, and Sourcegraph supporting it. Companies like Block and Apollo integrated MCP into their systems early, recognizing the value of a unified AI-data interface.
MCP Architecture Made Simple
MCP follows a straightforward architecture that's easy to understand if you're familiar with web concepts:
MCP Server: A lightweight program that exposes specific data or capabilities via the MCP standard. Each server typically connects to one data source or service (for example, a server might connect to your file system, a database, or Slack). Think of an MCP server as an adapter that knows how to fetch or manipulate a particular kind of data.
MCP Client: A component that runs in the AI application and maintains a connection to MCP servers. The client sends requests to servers and receives their responses. Usually, you don't interact with the MCP client directly – it's handled by the AI platform you use.
MCP Host (AI Application): This is an AI-powered app that wants to use external data/tools. It could be a chat assistant like Claude or ChatGPT, an IDE extension (like Cursor's AI assistant), or any "agent" that uses an LLM.
Data Sources and Services: These are the actual places where information or functionality resides. They can be local (files on your computer) or remote (web APIs, cloud services).
To visualize it: the AI (host) talks to a server (via a client library), and the server talks to some data or tool. The AI might say, "Hey server, give me the file report.pdf" or "Hey server, execute this database query" – using MCP's language – and the server will perform that action and return the result.

MCP Core Concepts
MCP defines a few core types of interactions that an AI can have with servers:
Resources: These are data or content that the server can provide to the AI. If we compare MCP to web tech, a resource is like a GET endpoint – the AI requests it to load information. For example, a file server might expose a resource file://README.md to get the content of a README file.
Tools: These are actions the AI can invoke via the server. This is like a POST endpoint – the AI provides input, and the server executes code or causes a side effect. Tools let the AI do things: run a calculation, modify data, send a message, etc.
Prompts: These are reusable prompt templates or workflows that the server can supply. It's like the server giving the AI a pre-written prompt to help guide complex tasks.
Sampling: An advanced feature where a server can request the AI to complete or transform text. It enables two-way communication: the AI can ask the server for data, and the server can ask the AI to analyze that data.
Let's use a kitchen analogy: Imagine an AI chef. A resource is like giving the chef an ingredient from the pantry (data it can use), a tool is like a kitchen appliance the chef can operate (actions it can take), and a prompt could be a recipe the chef can follow (a template for a process).
How MCP Communicates
MCP is designed to be secure and flexible. Since MCP servers might have access to sensitive data or perform powerful actions, the protocol emphasizes security controls. Servers can implement access controls, and the AI host often requires user approval before executing a tool.
MCP can work over different "transports":
STDIO Transport: The MCP server runs as a local process on the same machine as the host, and communication happens through standard input/output pipes. This mode is great for local development – it's simple and secure.
SSE (HTTP) Transport: The MCP server runs as a web service (locally or remotely), exposing an HTTP endpoint. This mode is more flexible – your server could be running on a different machine or cloud instance.
Both transports do the same job; they just differ in how the bytes get from point A to B. Under the hood, the protocol uses structured messages (often JSON) to encode requests and responses.
Building Your First MCP Server
Let's walk through creating a simple MCP server in Python:
First, install the MCP development kit:
pip install "mcp[cli]"Next, create a basic server script (server.py):
from mcp.server.fastmcp import FastMCP

# Create an MCP server and give it a name
mcp = FastMCP("DemoServer")

# Define a simple tool: add two numbers
@mcp.tool()
def add(a: int, b: int) -> int:
    """Add two numbers and return the result."""
    return a + b
Let's break down what's happening here:
We import FastMCP from the SDK
We create a server instance named "DemoServer"
We define an addition tool using the @mcp.tool() decorator
Prerequisites: Installing Node.js
Before using the MCP CLI tools, you'll need to have Node.js installed on your system. The MCP CLI uses Node.js components for some of its functionality.
Installing Node.js on Windows
Visit the official Node.js website:
Download the "LTS" (Long Term Support) version
Run the downloaded installer (.msi file)
Follow the installation wizard:
Accept the license agreement
Choose the default installation location
Select the default components
Click through the wizard and complete the installation
Important: Restart your command prompt or PowerShell window after installation
Installing Node.js on macOS
Option 1: Using Homebrew (recommended if you have Homebrew installed):
brew install nodeOption 2: Using the installer:
Visit the official Node.js website
Download the macOS installer (.pkg file)
Run the installer and follow the installation steps
Restart your terminal application
Installing Node.js on Linux
For Ubuntu/Debian:
sudo apt update sudo apt install nodejs npmNow when everything is set, we can continue
To run the server, execute:
python server.pyThis starts the server (without showing any indication), which will wait for connections from an AI client. To test it, you can use the MCP CLI's Inspector (run it on a different terminal).
Alternatively, you can do it this way:
mcp dev server.pyThis opens an interactive session where you can simulate an AI client and try out the server's capabilities.
you are supposed to see something like this:
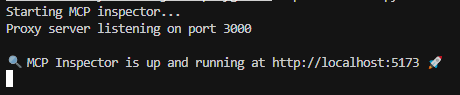
once the server is up and the client is connected, you can use the tool!!
This example is just for you to understand how to set up your own server. However, it's not a particularly interesting use case.
So instead, let's take a look at using an existing MCP server that allows us to connect our host to a server capable of controlling Blender.
big kudos and credit to this repo: blender-MCP
Connecting to an existing blender MCP server
here is a teaser I created :)
Foundation Requirements
Blender: Version 3.0 or newer
Python: Version 3.10 or newer
UV Package Manager: Essential for seamless integration
UV Installation - Platform-Specific Instructions
For Mac Users
brew install uvFor Windows Users
powershell -c "irm https://astral.sh/uv/install.ps1 | iex"
set Path=C:\Users\username\.local\bin;%Path%
Critical Notice: Complete UV installation before proceeding to ensure system compatibility.
Claude Desktop Integration
The Claude Desktop application serves as the central intelligence for your BlenderMCP experience. Proper configuration is essential for optimal performance:
Navigate to Claude > Settings > Developer > Edit Config
Locate the claude_desktop_config.json file
Enhance your configuration with the following JSON structure:
{
    "mcpServers": {
        "blender": {
            "command": "uvx",
            "args": [
                "blender-mcp"
            ]
        }
    }
}
Cursor Integration
For those preferring the Cursor environment, BlenderMCP offers full compatibility:
Access Cursor Settings > MCP
Implement the following command for temporary execution:
uvx blender-mcpAdvanced Configuration for Windows Cursor Users
Windows environments require a specific configuration for optimal performance:
Navigate to Settings > MCP > Add Server
Create a new server with the following precise configuration:
{
    "mcpServers": {
        "blender": {
            "command": "cmd",
            "args": [
                "/c",
                "uvx",
                "blender-mcp"
            ]
        }
    }
}
Critical Warning: Multiple MCP server instances can create conflicts. Ensure only one instance (either on Cursor or Claude Desktop) is active at any time.
Blender Addon Installation
The Blender add-on establishes a direct communication channel between your 3D environment and Claude AI:
Obtain the latest
addon.pyfile from the official repositoryLaunch your Blender installation
Navigate to Edit > Preferences > Add-ons in the main menu
Select "Install..." and locate your downloaded
addon.pyfileActivate the integration by enabling "Interface: Blender MCP" in the addon list
Establishing the Connection
In Blender's 3D View, reveal the sidebar by pressing the N key if not already visible
Locate and select the dedicated "BlenderMCP" tab
Initiate the connection by clicking "Start MCP Server"

More Real-World MCP Examples
The true power of MCP shines in the diverse integrations developers have created. Here are some examples:
Database Access: MCP servers for databases like PostgreSQL and SQLite allow an AI to execute read-only queries and retrieve results. Instead of you providing a schema and sample entries in the prompt, the AI can directly query your database.
Code Repositories: MCP servers for Git, GitHub, and GitLab enable your AI to search your codebase, read files, or even commit changes. This transforms AI pair programming – the AI can access the whole repository context when helping you.
Web Search: Servers like Brave Search and Fetch let an AI perform web searches or fetch web pages. If you ask the AI a current events question, it could use these tools to get up-to-date info.
Productivity Tools: MCP servers for Slack, Notion, and other platforms allow the AI to read messages or update task boards. Your AI assistant could cross-reference a conversation from Slack while you're coding.
Memory and Knowledge Bases: Servers for vector databases like Qdrant or Weaviate enable semantic search – the AI can store and retrieve embeddings, allowing it to recall information over time.
External APIs: Because MCP is flexible, many third-party services have connectors. There are servers for Stripe, AWS, Cloudflare, Docker, and more. If there's an API, you can wrap it in an MCP server.
Integrating MCP Into Your Projects
Here are some tips for integrating MCP smoothly:
Leverage Existing Servers: Before reinventing the wheel, check the official MCP examples and community repositories. There's a good chance someone has already built connectors for common tools.
Build Custom Servers: If your data source is proprietary or very custom, building your own MCP server is straightforward. The SDKs (in Python, TypeScript, Java, C#, etc.) make this relatively easy. You focus on hooking up to your system, and the protocol details are handled by the library.
Host Servers Appropriately: For small projects or local development, running servers on your machine is easiest. For larger setups or team use, you might deploy them on a server or cloud instance. Treat them like microservices.
Use MCP-Enabled AI Clients: Your AI model or agent needs to support MCP to take advantage of these servers. Claude Desktop, Cursor IDE, and frameworks like LangChain all offer MCP support.
Test and Iterate: As you add MCP to your project, continually test how the AI uses the new capabilities. Sometimes the AI will cleverly utilize a tool to solve a problem; other times it might need a nudge.
The Future of AI with MCP
Model Context Protocol is a game-changer for building AI applications that are truly aware and capable within our software ecosystems. It provides a common bridge for AI models to interact with everything from databases and file systems to web services and productivity tools.
The tone among developers is one of excitement. As of 2025, MCP is rapidly evolving, and it's being adopted in various platforms. Will it solve all AI integration problems? Perhaps not, but it's a solid step toward interoperability – a future where you can switch out AI models or move to new tools and still keep your integrations because they all speak MCP.
In fact, MCP can give you the flexibility to switch between different LLM providers without losing access to your data sources, since the protocol is model-agnostic.
For those of us building at the cutting edge, MCP offers a playground of possibilities. You can share custom MCP servers with the community, effectively sharing new "skills" for AI agents. You can focus on higher-level problems, knowing that connecting AI to a new database or API is no longer a week-long integration effort but maybe an afternoon's work.
Interesting from both theoretical and practical perspectives, thank you. I think I needed this to help structure the idea I have, I think over cohesively structuring tools, MCP provides a great approach.
Awesome post! To summarize, MCP I'd like an API for AI that utilizes context.